GPU Rig Mining
Thinking about building a GPU mining rig? It’s a smart move. Even with all the changes in the crypto world, it remains one of the most flexible ways to mine cryptocurrencies, especially altcoins. The basic idea is simple: you use powerful graphics cards (GPUs) to solve complex mathematical problems that help secure a blockchain network. For your contribution, you earn cryptocurrency rewards.
The real challenge, however, is striking the right balance. You need to weigh the initial investment in your hardware against the potential earnings over time. Ultimately, your profitability comes down to a few key factors: the efficiency of your equipment, the cost of your electricity, and the market value of the coin you choose to mine.
Your Blueprint for a Profitable Mining Rig
Before you even dream of buying a single component, you need a solid plan. The beauty of a GPU rig, unlike a specialized ASIC miner that’s locked into a single algorithm, is its versatility. If the profitability of one coin drops, you can easily pivot and start mining another. This flexibility is your greatest asset.
Think of your rig as a highly specialized, stripped-down PC built for one purpose: hashing. Every part you select plays a crucial role in its performance, stability, and overall efficiency. The decisions you make at this stage will directly impact your return on investment.
Core Components of a GPU Mining Rig
Let’s get down to the nuts and bolts. To bring your mining rig to life, you’ll need these essential components:
- Graphics Processing Units (GPUs): These are the heart of your operation. The GPUs perform the actual mining, and their combined computational power, known as your hashrate, determines your earning potential.
- Motherboard: You’ll need one with enough PCI-E slots to accommodate all the GPUs you plan to run. Look for dedicated mining motherboards; they are specifically designed to handle 6, 8, or even more cards stably.
- Power Supply Unit (PSU): Do not skimp on this component. A high-quality PSU with enough wattage to power all your components, plus a 20% safety margin, is absolutely non-negotiable. It’s the difference between a stable rig and a potential fire hazard.
- CPU and RAM: You don’t need a powerhouse here. A basic Intel Celeron or Pentium CPU and 4-8 GB of RAM are more than sufficient to run the operating system and mining software.
- Storage: A small SSD, typically in the 120-250 GB range, is ideal. It’s fast, reliable, and will boot your OS and software quickly.
- Open-Air Frame: Cooling is paramount. An open-air frame provides maximum airflow for your GPUs, which is crucial for preventing overheating and performance throttling.
- PCI-E Risers: These are extender cables that allow you to connect your GPUs to the motherboard while mounting them on the frame. This spacing is vital for effective cooling.
Balancing Cost, Power, and Performance
Choosing the right parts is a constant balancing act. If we look back to the early days, from around 2010 to 2017, GPU mining was the dominant force. Enthusiasts built rigs from standard desktop cards that could achieve 20-30 MH/s each on Ethereum. By 2016, the demand was so intense that NVIDIA reported a 30% surge in year-over-year revenue, largely driven by miners.
The same fundamental principle applies today: you must weigh a card’s hashrate against its power consumption and upfront cost. A top-tier GPU might offer an incredible hashrate, but if it consumes too much electricity, it could easily turn your profitable venture into a money pit.
Key Takeaway: The best GPU for mining isn’t always the most powerful one. It’s the most efficient one—the card that delivers the highest hashrate for every watt of power it consumes. Always run the numbers with your local electricity rate before buying anything.
To give you a clearer picture, I’ve put together a table showing how you might spec out a rig based on different budgets. This is just a starting point to help you match your expectations with your wallet. And before you pull the trigger on any purchases, it’s always a good idea to run the numbers yourself. You can learn more about how to do that in our guide on crypto mining profitability calculators.
Sample GPU Mining Rig Component Breakdown
Here’s a look at how you could approach building a rig, from a shoestring budget to a high-end setup. Notice how the key considerations shift with the investment.
| Component | Budget Option (Example) | Mid-Range Option (Example) | High-Performance (Example) | Key Consideration |
|---|---|---|---|---|
| GPU | NVIDIA RTX 3060 Ti | NVIDIA RTX 3080 | NVIDIA RTX 4090 | Hashrate vs. Power Draw (Efficiency) |
| Motherboard | ASUS B250 Mining Expert | ASRock H110 Pro BTC+ | Gigabyte Z690 AORUS PRO | Number of PCI-E slots & stability |
| PSU | 1x 850W Gold Rated PSU | 1x 1200W Platinum Rated PSU | 2x 1000W Platinum Rated PSUs | Total wattage and efficiency rating |
| Frame | DIY Wooden Frame | 6-GPU Steel Open-Air Frame | 8-12 GPU Aluminum Frame | Airflow, durability, and scalability |
In summary, the goal is to build a rig that is stable, efficient, and tailored to your specific circumstances. A well-planned rig will serve you far better in the long run than one thrown together with the most expensive parts you can find.
Assembling Your Hardware: From Box to Build
Alright, you’ve got a pile of expensive electronics sitting in front of you. Now for the fun part: turning that collection of parts into a money-making GPU mining rig. This stage requires patience and a methodical approach. Rushing here can lead to costly mistakes, so take your time and do it right the first time.
First things first: static electricity is your enemy. Before you handle a motherboard or a GPU, ground yourself by touching the metal case of your power supply or rig frame. This simple action can prevent you from frying a component before you even start. Set up your open-air frame on a clean, flat surface—this will be the skeleton holding everything together.
The entire process, from choosing parts to the final build, is a journey. The planning you’ve already done is the foundation for this hands-on assembly step.
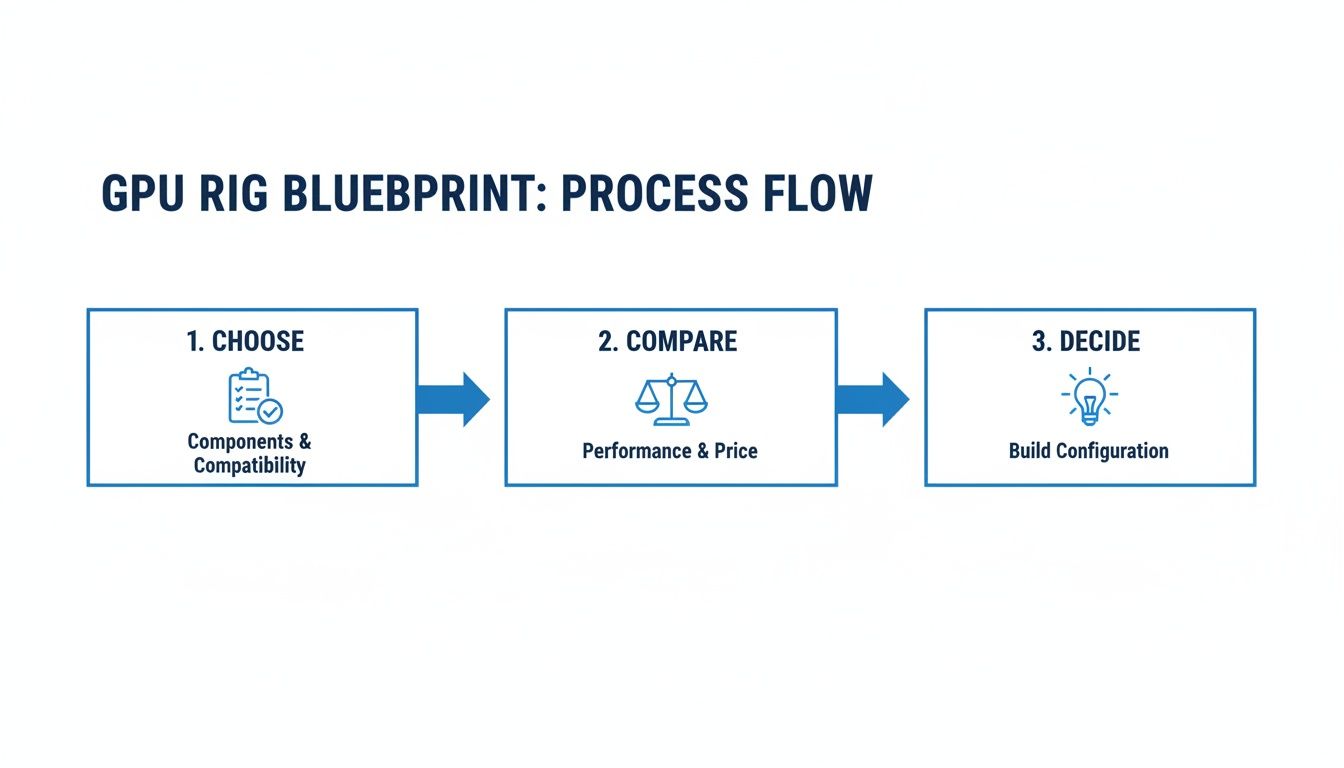
As you can see, a successful build is the direct result of good research. Now, let’s put that planning into action.
Step-by-Step Hardware Assembly
Follow these steps to assemble your rig methodically:
- Mount the Motherboard: Carefully align the motherboard with the mounting holes on your frame and secure it with screws. Make it snug, but don’t overtighten and risk cracking the board.
- Install the CPU: Lift the retention arm on the motherboard socket. Align the arrows on the processor and the socket, then gently set the CPU in place. It should drop in without any force. Lower the retention arm to lock it in.
- Insert the RAM: Open the clips on the memory slots. Align the notch on the RAM stick with the bump in the slot—it only fits one way. Press down firmly on both ends until the clips click into place.
- Connect GPUs with Risers: The secret to fitting multiple cards is using PCI-E risers. Attach a riser to each GPU’s PCI-E connector. Mount each GPU to the frame, ensuring they are secure and spaced out for airflow. Then, run the USB cables from each riser to the small PCI-E x1 slots on your motherboard.
- Install the Power Supply: Mount your PSU and connect the essential cables: the main 24-pin motherboard power and the 8-pin CPU power. Then, run the PCI-E power cables to your GPUs and their risers. Crucially, each GPU and its riser must be powered by cables from the same PSU. Mixing power sources is a recipe for disaster.
Pro Tip: Don’t forget the motherboard standoffs if your frame needs them. These little spacers create a vital air gap between the motherboard and the metal frame, preventing electrical shorts that can instantly kill your hardware.
For a broader look at the entire journey, our guide on how to start crypto mining provides a great overview.
Finalizing the Build with Smart Cable Management
The last step before powering on is cable management. This isn’t just about aesthetics; it’s about performance and longevity. A messy tangle of cables can choke airflow, causing your GPUs to run hotter, which means fans spin faster, you use more electricity, and your cards wear out sooner. Grab some zip ties and get to work.
- Bundle similar cables: Group motherboard, CPU, and GPU power lines together and route them cleanly.
- Create clear air channels: Ensure there’s an unobstructed path for cool air to enter and hot air to exit. Don’t let a stray cable block a fan.
- Do a final connection check: Double-check every single plug. Is it fully seated? Is everything snug? A loose power connection can cause instability or prevent the rig from booting at all.
To conclude this section, once everything is connected and tied down, your hardware build is officially complete. You should have a clean, organized rig ready for the next phase: software installation and configuration.
Dialing in Your System and BIOS Settings
With your rig physically built, it’s time to move from hardware to firmware. We need to get into the motherboard’s BIOS (or UEFI, on modern boards) and prime it for the unique workload of a multi-GPU mining setup. Honestly, getting these settings right from the get-go will save you from a world of frustration, like GPUs not being detected or the whole system randomly crashing.
Think of the BIOS as the computer’s most fundamental instruction manual. We’re about to make a few key edits to let it know we’re plugging in a whole bunch of graphics cards. The exact menu names might differ a bit between brands like ASUS, ASRock, or Gigabyte, but the settings we need to change are universal.
Essential BIOS Adjustments for Mining Stability
The first time you boot up, start tapping the key to enter the BIOS—it’s usually the Delete key, but sometimes it’s F2. Don’t let the interface intimidate you; we only need to touch a handful of things.
Here is a checklist of critical settings:
- Enable Above 4G Decoding: This is completely non-negotiable if you’re running four or more GPUs. It allows the system to properly assign memory addresses for all those cards. If this is off, your operating system will likely ignore half your GPUs.
- Set PCI-E Link Speed: Find the PCI-Express link speed settings and manually lock them to Gen1 or Gen2. While gaming PCs need the full bandwidth of Gen3 or Gen4, mining barely uses the PCIe slot’s data capacity. Forcing a lower speed drastically improves stability, especially when using PCI-E risers.
- Configure Onboard Graphics: If your CPU has an integrated GPU, tell the BIOS to use it as the primary display. This frees up your first mining GPU from handling the desktop, which can prevent conflicts during setup.
- Disable Unnecessary Features: Turn off anything you won’t be using, such as onboard audio, serial ports, and extra SATA controllers. This frees up system resources and removes potential points of failure.
Save your changes and exit the BIOS. Now your hardware is properly configured and ready for an operating system.
Choosing Your Mining Operating System
The OS is the brain of your operation, and you have a few solid choices. The decision really comes down to your comfort level and how you plan to manage the rig.
Key Insight: Your OS choice dictates your entire management workflow. A dedicated mining OS is built for remote, hands-off administration, while Windows offers a familiar environment that’s great for a machine you might use for other things.
Let’s look at the main contenders for a gpu rig mining setup.
| Operating System | Pros | Cons | Best For |
|---|---|---|---|
| Windows 10/11 | Familiar interface, wide driver support, great for dual-use (gaming/mining) PCs. | Can be unstable with many GPUs, requires manual setup for remote access, frequent updates can cause issues. | Beginners or users with a single, multi-purpose rig. |
| HiveOS | Purpose-built for mining, excellent remote management dashboard, stable with many GPUs. | Has a small monthly fee for rigs with more than one worker, steeper learning curve than Windows. | Miners with multiple rigs who need robust remote control and monitoring. |
| RaveOS | Similar to HiveOS with a focus on stability and performance, offers a free tier for one rig. | Smaller community compared to HiveOS, interface can be less intuitive for new users. | Miners looking for a cost-effective alternative to HiveOS with powerful management tools. |
In short, for anyone serious about running a dedicated rig 24/7, a Linux-based system like HiveOS or RaveOS is highly recommended. Their rock-solid stability and phenomenal remote management features are purpose-built for mining. You simply flash the OS onto a USB drive or SSD, configure it through a web panel, and you can control your entire mining farm from anywhere in the world.
Once your OS is installed, the final step is to install the correct GPU drivers. On Windows, grab the latest version from the NVIDIA or AMD website. On dedicated mining OSes like HiveOS, the drivers are usually built-in.
Picking Your Mining Pool and Software
Alright, your rig is built, the BIOS is dialed in, and your operating system is up and running. Now for the part that actually makes you money: connecting to a mining pool.
Let’s be clear: trying to mine solo is a fool’s errand for most people. The odds of your rig finding a block by itself are incredibly slim. Joining a mining pool is the only realistic path to getting a steady, predictable income from your GPU rig mining efforts.
Think of a pool as a team. It combines the hashing power of thousands of miners, massively increasing the collective chance of solving a block and earning a reward. When the pool finds a block, everyone who contributed gets a share of the reward, proportional to the work they put in. It turns a lottery into a steady paycheck.
Making a Smart, Data-Driven Pool Decision
Don’t just join the first pool you see. Factors like fees, payout models, and server locations can significantly impact your profits. This is why a tool like MiningPoolStats is so valuable—it lays out all the critical data so you can compare pools intelligently.
You can see at a glance what the ecosystem looks like for any given coin.
This dashboard instantly shows which pools have the most network hashrate. A larger share of the network hashrate generally means the pool finds blocks more frequently, leading to more consistent payouts for you.
The crypto landscape shifted around 2019 as ASICs became more dominant for certain coins, but GPUs remain king for many altcoins. This means looking for established pools like Antpool or Binance Pool that offer solid support for GPU-mined coins. Most reputable pools charge a fee of 1-4%. Using data to pick the right one is key to scaling your operation. You can read more about this industry shift on BusinessWire.
Understanding Payout Models and Fees
Once you’ve vetted a pool for reliability, scrutinize its payout model. Different pools pay out in different ways, each with its own pros and cons.
Your choice of payout model boils down to a classic trade-off: Do you want guaranteed, stable income, or are you willing to risk some volatility for potentially higher rewards? PPS+ is the safe bet, while PPLNS can pay more if the pool gets lucky.
Let’s look at the most common payout systems you’ll run into.
Mining Pool Payout Model Comparison
| Payout Model | How It Works | Pros | Cons | Best For |
|---|---|---|---|---|
| PPS+ | Pay-Per-Share Plus. You get a fixed payment for every valid share you submit, plus a portion of the transaction fees from blocks the pool finds. | Highly predictable and stable income, regardless of pool luck. | Payouts can be slightly lower than PPLNS during lucky streaks. | Miners who need consistent, reliable daily income to cover costs. |
| PPLNS | Pay-Per-Last-N-Shares. Payouts are based on the number of shares you submitted during the last ‘N’ shares it took the pool to find a block. | Higher potential payouts when the pool is lucky (finds blocks quickly). | Income can be volatile; unlucky rounds mean lower or no payouts. | Miners with low electricity costs who can handle income fluctuations. |
| SOLO | You use the pool’s infrastructure but only get paid if you personally find a block. The pool takes a small fee for the service. | You keep the entire block reward (minus the pool fee). | Extremely high-risk. You could mine for years without a payout. | Large-scale mining farms with enough hashrate to have a realistic chance. |
Getting Your Miner Software Configured
With a pool selected, it’s time to point your rig in the right direction using dedicated miner software. Popular choices include Gminer, T-Rex Miner, and lolMiner. This software is the final piece of the puzzle, connecting your GPUs to the pool’s servers.
Configuration is surprisingly straightforward. It’s usually handled through a simple batch file (.bat) on Windows or a “flight sheet” on a dedicated mining OS. For a more detailed walkthrough, check out our guide on how to join a mining pool.
Here’s a real-world example of a T-Rex Miner batch file for mining Ethereum Classic (ETC) on the 2Miners pool:
t-rex.exe -a etchash -o stratum+tcp://etc.2miners.com:1010 -u YOUR_WALLET_ADDRESS -p x -w YOUR_RIG_NAME
Let’s quickly break down that command:
-a etchash: Specifies the mining algorithm (must match your chosen coin).-o stratum+tcp://etc.2miners.com:1010: The pool’s server address. Choose a server physically close to you.-u YOUR_WALLET_ADDRESS: Your personal crypto wallet address for payouts. Triple-check this!-w YOUR_RIG_NAME: A name for your rig (e.g., “Rig01”) for easy identification on the pool dashboard.
Once you’ve created this file with your own details, just save it and double-click to run it. A command window will appear, and you should see your GPUs start mining. You can then monitor your progress on the pool’s website using your wallet address.
Fine-Tuning Your Rig for Maximum Profit
Getting your hardware assembled and running is a huge step, but the real work—and the real profit—starts with software tuning. This is where we transform a pile of powerful components into an efficient, money-making machine.
Running your GPUs at their factory settings is a classic rookie mistake. You’ll burn too much electricity, generate excess heat, and leave potential earnings on the table. With careful tweaking, we can increase hashrates while decreasing power consumption to find the perfect balance for profitability.
The Core Levers of GPU Tuning
The goal here is to find the “sweet spot” for each graphics card. This isn’t a one-size-fits-all setting; it’s a delicate balance between three key parameters. You can adjust these using software like MSI Afterburner on Windows or directly in the control panel of a mining OS like HiveOS.
Here are the dials you’ll be turning:
- Core Clock: The speed of the main GPU processor. For many algorithms, we underclock the core to save a significant amount of power with minimal impact on hashrate.
- Memory Clock: The speed of your GPU’s VRAM. For memory-intensive algorithms, increasing this clock speed directly boosts your hashrate.
- Power Limit: This setting caps the maximum electricity (in watts) the GPU can draw. It’s your most powerful tool for cutting electricity costs and keeping temperatures down.
This is an iterative process: adjust a setting, let the miner run, observe the results, and repeat. Getting it right can boost your rig’s efficiency by 20-30% or more.
A Practical Method for Finding Your GPU’s Sweet Spot
Every GPU is slightly different due to the “silicon lottery”—some chips just perform better than others. Because of this, you need a methodical approach to find the optimal settings for each card.
- Set a Baseline: Start by lowering the Power Limit to around 70-80% of its maximum.
- Increase Memory Clock: Bump up the Memory Clock in small increments (+25 or +50 MHz). After each change, watch for instability or hashrate increases.
- Find the Limit: Eventually, you’ll push the memory too far, causing crashes or errors. When this happens, back the clock down by 50-100 MHz to a stable level.
- Decrease Core Clock: Finally, start dialing back the Core Clock in -25 MHz increments. You’ll likely find you can lower it significantly, saving more power with little to no loss in hashrate.
Key Takeaway: The goal isn’t just the highest hashrate; it’s the highest efficiency. A card running at 60 MH/s using 100 watts is infinitely more profitable than one pushing 62 MH/s but guzzling 150 watts. Efficiency is profit.
Keeping an Eye on Your Rig’s Vitals
Once your rig is tuned, your job shifts from setup to monitoring. Consistent oversight keeps a rig stable and profitable long-term. Dedicated mining OSes provide excellent web-based dashboards, while on Windows, you can use your mining software’s console combined with a tool like HWiNFO64.
Here’s a breakdown of the critical metrics to watch.
| Metric | What It Tells You | Why It Matters | Ideal Range |
|---|---|---|---|
| Hashrate | Your rig’s raw mining power. | This is your earning potential. Sudden drops mean something is wrong. | Stable and consistent for each GPU. |
| GPU Temperature | How hot the GPU core is running. | High heat kills performance (thermal throttling) and degrades hardware. | Below 70°C, but 50-65°C is the sweet spot. |
| Fan Speed | How hard the fans are working. | A good indicator of the cooling system’s effort. | 50-80%. If it’s pinned at 100%, the card is too hot. |
| Power Consumption | The electricity each GPU is using. | This is the biggest variable in your profitability equation. | As low as possible for your target hashrate. |
In summary, by watching these numbers, you can spot trouble before it takes your rig offline. This kind of proactive, data-driven maintenance will protect your hardware investment and keep your GPU rig mining operation profitable.
Frequently Asked Questions About GPU Rig Mining
Diving into GPU rig mining always sparks a few questions, especially for beginners. Let’s tackle some of the most common ones to help you avoid pitfalls and refine your strategy.
Is GPU mining still profitable today?
Yes, but profitability depends heavily on your specific situation. The three main factors are:
- Electricity Cost: This is your biggest ongoing expense. Lower is always better.
- Hardware Efficiency: How much hashrate you get per watt of power consumed.
- Cryptocurrency Prices: The market value of the coin you are mining.
While the landscape changed after Ethereum moved to Proof-of-Stake, numerous altcoins like Kaspa, Ravencoin, and Ergo are still profitable to mine with GPUs. To find out if it’s worth it for you, use an online mining profitability calculator. Enter your GPU model and electricity rate to get a real-time estimate of potential earnings.
How many GPUs can one mining rig have?
The number of GPUs a single rig can support is limited by the motherboard, power supply, and operating system.
- Motherboard: Standard consumer motherboards typically support 6 to 8 GPUs. Specialized mining motherboards can handle up to 19 GPUs.
- Power Supply: Your PSU must have enough wattage to power all components with a 20% safety margin. For rigs with more than 8 GPUs, you will likely need to synchronize two separate PSUs.
- Operating System: Windows can become unstable with a high number of GPUs. Linux-based systems like HiveOS are much more stable and are recommended for large rigs.
What are the most common problems with a new rig?
Most first-time issues fall into three categories:
- GPUs Not Detected: This is often caused by a faulty PCI-E riser, incorrect BIOS settings (ensure “Above 4G Decoding” is enabled), or missing GPU drivers.
- System Instability: Random crashes or reboots are usually a sign of an unstable overclock. Try reducing your memory or core clock settings. It can also indicate an underpowered or failing PSU.
- Overheating: This is an airflow problem. Ensure your rig has proper ventilation and is not in a confined space. You may need to adjust your fan curves to be more aggressive to keep temperatures in check.
I received my first mining payout. What should I do now?
Congratulations! Once the crypto hits your wallet, you have a few options:
- HODL: Hold the cryptocurrency, hoping its value will increase over time.
- Trade: Exchange it for another cryptocurrency on an exchange.
- Sell: Convert it to fiat currency (like USD or EUR) to cover your electricity costs and take profits.
Many miners use a hybrid strategy: sell enough to cover monthly operational costs and hold the rest. Whichever path you choose, keep detailed records of your mining income and expenses for tax purposes, as mined crypto is often considered taxable income.