How to Set Up Mining Pool — ASIC Miner Connection Step by Step
In 2026, successful cryptocurrency mining in the United States depends on choosing the right mining pool and connecting your ASIC miner correctly. Whether you run a single rig at home or manage a small farm, a proper setup ensures stable hashrate, minimal downtime, and consistent payouts. This comprehensive guide walks you through every detail of how to set up a mining pool connection so you can start earning more effectively.
Setting up your ASIC miner to connect to a pool is straightforward when done methodically. Many miners lose valuable time and revenue due to small configuration mistakes. By following the exact steps below, you will learn how to connect ASIC to pool, enter the correct Stratum address, and verify everything works smoothly. We cover popular pools including ViaBTC and EMCD, as well as general best practices for Bitcoin mining pools.
Thousands of miners across the USA rely on reliable pools to maximize profits. A well-configured connection means your hardware works at full capacity without interruptions. Let’s begin with the essentials you need before touching any settings.
What You Need Before Connecting to a Mining Pool
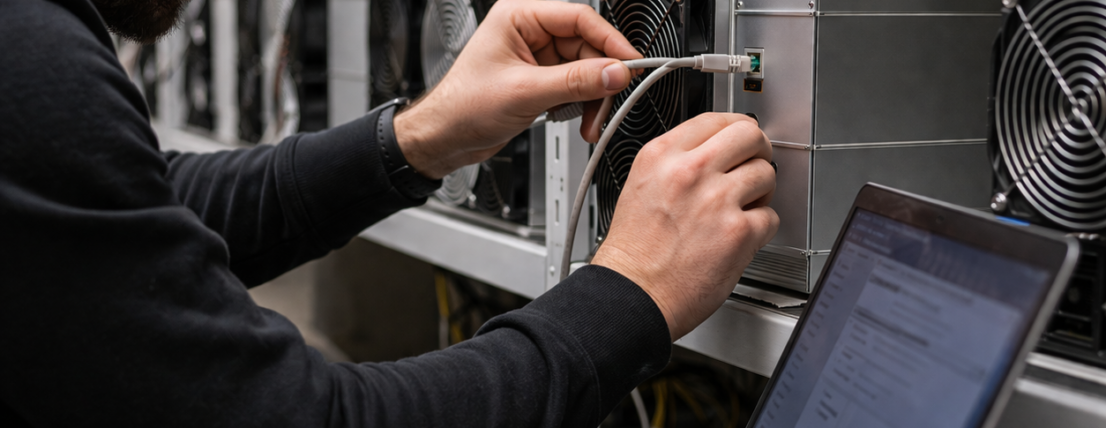
Before you start the configuration process, gather everything required for a successful connection. First, make sure your ASIC miner — such as an Antminer model — is fully assembled, powered, and in good working condition. A stable wired Ethernet connection is essential; Wi-Fi is not recommended because it often causes disconnections and lost shares.
You will also need a Bitcoin wallet address where you want to receive payouts. Most pools allow you to use your wallet address directly as the username, which simplifies the setup. Create an account on your chosen mining pool if you haven’t already. During registration, note down the Stratum URLs and ports provided for your region — servers located in North America usually offer the lowest latency for miners in the United States.
Have a computer or laptop on the same local network as the miner. You will use it to find the miner’s IP address and access its web interface. A reliable power supply with sufficient capacity is critical, as ASIC miners consume significant electricity. Proper cooling is equally important to prevent thermal throttling during long mining sessions.
Finally, decide which pool best fits your needs. Compare fees, payout thresholds, and supported coins. Once prepared, you are ready to move to the first technical step: discovering your miner’s IP address in the network.
Preparing Your Network and Power Setup
Connect the miner directly to your router using a high-quality Ethernet cable. Ensure the router port is not blocked by any firewall rules. For larger setups, consider assigning a static IP address to the miner so it always remains reachable at the same location.
Place the miner in a well-ventilated area with adequate airflow. Check that your electrical circuit can handle the power draw without tripping breakers. These small preparations prevent most connectivity and stability issues later.
Creating Your Pool Account and Collecting Data
Register on the pool website and verify your wallet address. Locate the “Getting Started” or “Pool Configuration” section to copy the exact Stratum addresses. Popular choices for US miners include ViaBTC and EMCD because of their responsive support and competitive fees. Write down the primary Stratum URL, backup URLs, and any recommended ports.
Create a unique worker name for each miner. This helps you monitor individual device performance inside the pool dashboard.
How to Find the IP Address of Your ASIC Miner
Locating the miner’s IP address is the gateway to all further configuration. Without it, you cannot access the web interface to make changes. The easiest method for most Antminer users is the official IP Reporter tool provided by the manufacturer.
Download the IP Reporter software from the official Bitmain website, run it as administrator on your computer, and press the IP button on the miner’s control board. The tool will quickly display all detected miners with their current IP addresses. Note the one that matches your device — it typically starts with 192.168.1 or 192.168.0.
Another reliable way is to log into your router’s admin panel and check the list of connected devices. Look for the miner by its MAC address or manufacturer name. This approach works well when you have multiple devices on the network. Once you have the correct IP, open a web browser and enter it in the address bar to confirm you can reach the login page.
Having a stable IP makes future troubleshooting much easier. If the address changes after a router restart, simply repeat the discovery process. Proper IP identification is a foundational step in ASIC miner pool setup and saves significant time during initial configuration.
Using Software Tools for IP Discovery
The official IP Reporter is fast and accurate. Keep your computer connected to the same local network as the miner for best results. Avoid using public networks during this process.
Checking Connected Devices in Your Router
Most modern routers display active clients with device names and IP addresses. Sort the list by connection time or manufacturer to locate your ASIC quickly.
How to Log Into the Miner’s Web Interface
Once you know the IP address, type it into your browser. You will see the login screen. The default credentials for most Antminer models are username “root” and password “root”. Change the password immediately after your first login to protect your device from unauthorized access.
The web interface gives you full control over the miner’s settings, including pool configuration, frequency, and fan speeds. It is designed to be user-friendly, with clear tabs for Status, Miner Configuration, and System settings. Take a moment to review the current status — check temperatures, fan RPM, and current hashrate before making changes.
If the miner is brand new, it may still be in factory default mode. The interface will guide you through the basic setup. Logging in successfully opens the door to customizing your miner exactly the way you want for optimal performance on your chosen pool.
Securing Access to the Web Interface
Always replace the default password with a strong, unique one right after logging in. This small step significantly improves security for your mining hardware.
Exploring the Main Sections of the Interface
Familiarize yourself with the Status page for real-time data and the Configuration tab where you will enter pool details. Understanding the layout helps you navigate quickly during future adjustments.
Entering the Stratum Address and Worker Name
Navigate to the Miner Configuration or Pool Settings section. You will see fields for up to three pools — primary and two backups. In the first URL field, enter the Stratum address exactly as provided by the pool. The format is usually stratum+tcp://pool-address:port.
In the Worker field, input your worker name in the format username.workername. This allows the pool to identify your specific miner. For the Password field, most pools accept “x” or simply leave it blank.
How to add a pool to ASIC correctly? Double-check every character — even a single space or typo will prevent connection. For ViaBTC pool setup, use the North American servers for lower latency. The same applies to EMCD pool configuration — select the closest regional server. Fill in backup pools in the second and third slots so your miner automatically switches if the primary server becomes unavailable.
After entering all details, click “Save & Apply”. The miner will restart its connection and begin submitting shares. This is the core step in how to connect miner to pool and how to configure Antminer for profitable mining.
Setting up Antpool or any other service follows the same logic. The only difference lies in the specific Stratum URLs. Once saved, monitor the interface for connection status and rising hashrate.
Examples of Stratum Addresses for Popular Pools
Always copy the latest Stratum URLs directly from the pool’s official website, as they can be updated periodically.
Setting Up Backup Pools for Reliability
Backup pools act as automatic failover. If the main pool experiences issues, your miner switches seamlessly and continues working without downtime.
Verifying the Connection Status
After applying the settings, wait 2–5 minutes and check the miner’s web interface. The active pool should show as connected, and the hashrate should begin climbing toward the expected value. Next, log into your pool account and locate your worker. You should see accepted shares appearing in real time.
How to mine on a pool successfully? Monitor key indicators: accepted shares, rejected shares, and overall efficiency. If everything looks normal, your setup is working correctly. Many miners in the USA use the pool’s mobile app or dashboard for convenient remote monitoring.
Keep an eye on chip temperatures — they must stay within safe limits. If the hashrate is lower than expected, revisit the configuration and verify all entered data. A successful connection is confirmed by steady share submission and eventual payouts to your wallet.
Regular monitoring helps you catch issues early and fine-tune performance. Most pools provide detailed statistics, graphs, and payout history to help you analyze and improve your mining operation.
Monitoring Through the Pool Dashboard
The pool dashboard shows live hashrate, share statistics, and estimated earnings. Use this information to track daily performance.
Signs of a Successful Connection
Green connection status, steadily increasing hashrate, and continuous accepted shares indicate everything is configured properly.
Common Mistakes When Setting Up and How to Fix Them
One of the most frequent errors is entering an incorrect Stratum address or port. Always copy and paste directly from the pool website instead of typing manually. Even a tiny mistake will cause the miner to fail to connect.
Another common issue is using the wrong worker name format. Make sure the username and worker identifier are separated by a period and match the pool’s requirements exactly. Case sensitivity matters in many cases.
Network-related problems often stem from unstable internet, firewall blocks, or poor cable quality. Try restarting your router and miner, or switch to a different Ethernet port. Changing DNS servers to public ones like 8.8.8.8 can also resolve connectivity issues.
Overheating or insufficient power supply can indirectly affect connection stability. Ensure proper cooling and that your electrical setup can sustain continuous operation. In rare cases, updating the miner’s firmware to the latest version improves compatibility with modern pools.
If the miner does not appear in the network at all, perform a factory reset using the physical button or menu option, then repeat the IP discovery and configuration process from the beginning.
Avoiding these typical pitfalls will make your mining pool setup smooth and efficient. Experienced miners often keep notes of their configurations for quick recovery if something goes wrong.
Network-Related Errors and Solutions
Test the ping to the pool server. High latency can reduce efficiency even if the connection eventually succeeds.
Authentication Problems
If the pool rejects the connection, double-check your username, worker name, and password format carefully.
By following this detailed step-by-step guide, you can confidently set up your ASIC miner for any major mining pool in 2026. Whether you choose ViaBTC, EMCD, or another reliable service, a correct configuration ensures maximum profitability and minimal headaches. Regularly review pool conditions, compare fees, and optimize your settings to get the most out of your hardware investment.
Start mining smarter today. A properly connected ASIC miner working on a stable pool is one of the best ways to generate consistent cryptocurrency income in the United States.
- Use a wired Ethernet connection for maximum stability during mining.
- Always create unique worker names for each individual miner.
- Configure at least one backup pool to prevent downtime.
- Monitor temperatures and hashrate regularly after setup.
- Keep pool Stratum addresses updated from official sources.